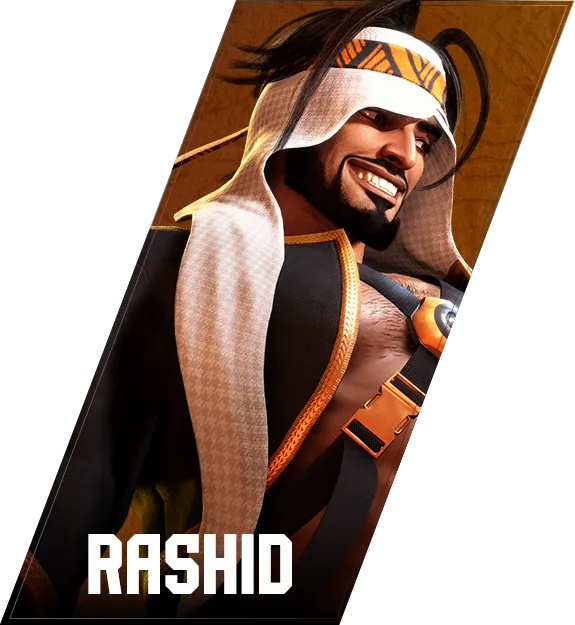

ラシード
Rashid — 대책
Key Info
- Sustained overhead — with combo on hit
- Defence
- OD Spinning Mixer (236PP): 6F startup, fully invincible
- If you play Luke or Kimberly, avoid Drive Rush after throws
- Spinning Mixer HP (236HP): 6F startup, anti-air invincible
- SA1 Super Rashid Kick (236236K): 9F startup, no projectile invincibility
- SA2 Ysaar (214214K): 12F startup, no invincibility
- SA3 Altair (236236P): 7F startup, fully invincible
- OD Spinning Mixer (236PP): 6F startup, fully invincible
- Advantage on block
- MP: +1F
- 2MP: +1F
- (気流接触中に)236LP: +2F
Neutral Game (Focus Points)
- Use raw Drive Rush frequently
- Rashid lacks fast, strong light normals, making stopping his Drive Rush on reaction difficult for him to deal with
- He may counter with OD reversal, but it grants no okizeme and the damage is minimal — it barely hurts
- Jump forward often
- All of his anti-air tools have weak hitboxes; even his most reliable Spinning Mixer HP (236HP) only covers upward direction and loses to empty jump-ins
- Also remember that throwing out a jump attack early with downward priority can stuff 236HP before it even activates
- Respond to Whirlwind Shot (236K)
- Blocking a fully charged Whirlwind Shot (236LK max charge) lets him follow with Airflow Spinning Mixer LP or a jump, building close-range advantage
- If you cannot punish the charge from your spacing, retreat to the corner to whiff the projectile
- When you read a charge, respond with Drive Impact or a jump-in
- Never passively accept it without any action
- Understand the fuzzy window against Ysaar (SA2)
- He sometimes launches Ysaar by kicking it out with Arabian Cyclone (214P)
- It may appear to be an overhead/low mix-up, but both options are actually fuzzy-guardable — do not be lazy, apply it every time
- Arabian Cyclone (214P) counter-strategy
- Arabian Cyclone HP (214HP) leaves Rashid at +1F on block
- Jump to evade it and aim for return damage during pressure gaps
- When he tries to counter your reversal attempt, he uses 214LP or 214MP
- Both 214LP and 214MP are punishable with Drive Impact
- Arabian Cyclone HP (214HP) leaves Rashid at +1F on block
- Understanding his footsie tools
- Rashid's main ways to get return in the center are 2MK Cancel Drive Rush and MK counter-hit
- MK requires a counter-hit to combo — it does not convert on normal hit into advancing normals
- 2MK gives return on normal hit but has short range
- Placing a non-advancing normal at the range where 2MK barely misses wins the risk-return battle — research your character's hurtbox and find the right button
Arabian Cyclone (214P)
Startup and recovery vary by strength.
- 214LP
- Cancelled from a light normal: 6F reversal crush. Cancelled from a medium normal: true block string.
- If cancelled from a light, a 5F long-reaching normal can stuff the startup
- A 4F normal will whiff if he chose 214HP — pressing a 5F normal at fastest frame is more reliable
- Research whether your character's 5F button stuffs both 214LP and 214HP
- -6F on block — punish every time
- Drive Impact is guaranteed, but he can cancel into SA3 (Altair) — confirm he has no SA3 before pressing Drive Impact
- Cancelled from a light normal: 6F reversal crush. Cancelled from a medium normal: true block string.
- 214MP
- Cancelled from a medium normal: reversal crush
- High return on counter-hit in the corner, so many Rashid players use it there; in the center the return is low — less reason to worry about it
- -4F on block — punish every time
- 214HP
- Cancelled from normals, leaves Rashid at +1F on block
- Has Drive Impact-stopping property
- Jump is a viable risk-return counter, but the light/medium reversal crush options mean it is not a stable answer
- Note: vertical jump in the center can be punished by normal → Whirlwind Shot
Recommended Counter
- Making it a guessing game between back jump and Drive Impact is the realistic, simple approach
- Back jump may eat 214LP, but in the center there is no combo follow-up
- Holding back jump throughout his pressure sequences is excellent risk-return in the center
- In the corner, if you eat 214P he can combo — play the proper guessing game there
- Back jump may eat 214LP, but in the center there is no combo follow-up
- When you read a light-normal cancel into 214P, pressing a 5F long-range normal at fastest frame stuffs both 214LP and 214HP
- Fuzzy Parry (aimed at Just Parry) at the timing you would block 214LP is also effective
- Showing this makes him aim for charged Whirlwind Shot, which you can then Drive Impact through — building a read-cycle guessing game
Pressing Parry at 214P block timing is an excellent counter in theory, but it is difficult and the return is limited.
In the center, back jump is rock-solid the moment you sense Arabian Cyclone — no combo follow-up as shown below.
In the corner, 214LP combos so you have to play the proper guessing game — Drive Impact is the recommended counter since his combo after 214HP gets stuffed is cheap, giving you great risk-return.
Whirlwind Shot (236K)
A parabolic projectile. Jumping over it can still land you on top of it at certain timings, resulting in big damage.
- 236LK: allowing a full charge activates airflow-enhanced state, giving Rashid advantage to continue offense
- 236MK: flight distance varies by strength; LP and HP are used most in matches — no need to over-think MK; it is sometimes used to hit back-jumping opponents but the risk is too high so it rarely appears
- 236HK: longer total recovery than other versions; if you have a fireball character, you can win the fireball exchange
Recommended Counter
- Drive Impact and jump are the most straightforward effective options
- Characters with a projectile-invincible move have a reliable punish opportunity
- When you see him charging, retreat to the corner to whiff the shot
Eagle Spike (214K)
Rashid's combo ender and advancing move. In airflow-enhanced state, it loses the punish window on block. Damage and carry vary by strength.
- 214LK
- 214MK
- 214HK
- 214KK (OD): side switch
--- Airflow-enhanced versions:
- (Airflow) 214LK
- (Airflow) 214MK
- (Airflow) 214HK
- (Airflow) 214KK: side switch
Recommended Counter
- On block: all non-airflow versions are punishable — cancel Drive Rush or step into a heavy attack; never skip the punish
- Airflow versions have no punish on block — do not confuse them with the normal versions
Spinning Mixer (236P)
Angle varies by strength.
- 236LP: frequently thrown out carelessly — after blocking you are at point-blank -3F range (his throw range); counter with a 7F-or-faster medium or a normal throw; do not reflexively press a 4F button here as the return is low
- 236MP: intended to punish vertical jumps but the hitbox is weak; placing a jump attack early triggers a punish counter easily — vertical jump is very effective
- 236HP: his main anti-air, can also hit cross-ups; however the hurtbox rises before the hitbox, so an early jump attack with downward hitbox stuffs it; if you fear HP Spinning Mixer anti-airs, prioritise throwing out jump attacks early
- 236PP (OD): Rashid's invincible reversal — used as a reversal
--- Airflow-enhanced versions (combo follow-up on hit):
- (Airflow) 236LP: +2F on block
- (Airflow) 236MP
- (Airflow) 236HP
- (Airflow) 236PP (OD)
Recommended Counter
- 236LP: -3F on block at throw range — press 7F medium or throw
- 236MP: attack early to stuff it
- 236HP: empty jump / early jump attack with downward hitbox
- 236PP (OD): no hitbox directly above — meaty jump-in on wakeup is effective
(気流接触中に)236LP
After blocking a fully charged Whirlwind Shot (236LK max charge), he may follow with Airflow Spinning Mixer LP. Blocking it creates a +2F point-blank situation for him. Options after blocking:
- Block → Drive Reversal
- Initially considered effective, but spending 2 Drive bars on Drive Reversal is high risk; Ysaar setups can still corner you afterward
- Block → play the +2F guessing game
- Engage the strike/throw mix-up without Drive Reversal
- His midscreen throw situation is poor — back wakeup after throw gives no okizeme; accepting the throw is viable when your Drive Gauge is low
- Hard counter: walking back after blocking takes you outside throw range — constant back-walk is highly effective; it also prevents his 2LK→2LP light combo from connecting
Recommended Counter
After blocking Airflow Spinning Mixer LP:
- Walk back after blocking
- In the center, back-walking makes his 2LK→LP follow-up LP whiff — no combo lands
- Back-walking also stuffs his delayed tech attempts
- 2MK Cancel Drive Rush does damage if he commits, but the Drive Gauge cost is heavy — Rashid himself dislikes that choice
- Advanced hard counter
- Walk-back fuzzy crouch-guard beats every expected option
- From +2F, his fastest option is 2MK at 7F startup — you have 5F of walking time before it activates
- Walk back → crouch-guard at the timing 2MK would hit — his throw whiffs and you block 2MK
- The small backward movement also prevents 2LK→2LP from comboing
The clip records, after blocking Airflow Spinning Mixer LP:
- Throw — 2F of back-walk whiffs it; confirm the whiff and press a crouching attack as a fuzzy follow-up
- 2MK→236LP — 5F of back-walk; take your time transitioning into crouch-guard; eating it leads to high Cancel Drive Rush return
- 2LK→2LP→236LP — even if late crouch-guard input eats 2LK, as long as you walked back correctly there is no combo
MP→HK (Target Combo)
Some Rashid players autopilot MP without confirming the hit — prepare a counter. The subsequent guessing game:
- 214LP: reversal crush
- 214HP: setup disguised as an answer to 214LP reversal crush — 214HP on block leaves Rashid at +1F point-blank
Recommended Counter
- Fuzzy-press a 4F button at the timing you would block 214LP. The window is 7F — anyone can do it with practice.
Warning
- Rashid has a fuzzy-read option: 214MP. Waiting 3F and then pressing a 4F button covers it, but the window is only 1F — not realistic in a real match.
- 214MP loses to fastest mash and is punishable on block — Rashid himself dislikes using it.
2MP
+1F on block. Treat it as +2F or more in practice since it is mainly used in setplay okizeme with carry.
Rashid's main pressure sequences after 2MP:
- 2MP→MP→2MK→Arabian Cyclone: reversal crush through MP; 2MK is a steal with a 6F gap after MP — counter-hit on MP leads to a combo
- 2MP→MP→6MP→Arabian Cyclone: jumping after blocking MP gets hit by 6MP
- 2MP→throw
Recommended Counter
- In the center: input a back-walk and crouch-guard at the timing 2MK arrives — this whiffs Arabian Cyclone HP (214HP)
- In the corner: forward jump after blocking the second MP in the sequence
- His most frequent option is 2MK which always reaches — jumping evades it
- When forward jumping, throw out a jump attack early with downward priority to stuff Spinning Mixer HP (236HP)
6HP (Overhead)
Rashid's overhead. Combos on sustained (meaty) hit. The most common timing is after Eagle Spike MK hit → MK frame-burn into meaty 6HP — learn this pattern.
Recommended Counter
Even landing the sustained hit, Rashid is at -1F in throw range.
- Confirm the frame-burn setup and aim for a Just Parry to counter the overhead
- If you block the sustained overhead, always reversal mash immediately
SA2 Ysaar (214214K)
One of the top-tier SAs in SF6. From midscreen activation, being sent to the corner is essentially guaranteed. Finding a good counter is difficult, and at high Rashid skill levels, this SA can nearly lock you down completely.
Recommended Counter
Depending on both players' gauge, the recommended approach is: forward jump and intentionally take the Ysaar airborne hit — this is highly effective.
Depending on how he spends gauge you may eat 2000–4000 damage. But trading that against being cornered while he uses Ysaar as a shield to drain 2–4 Drive bars, compared to eating two 1200-damage throws, is actually a worse deal. Willingly flying into Ysaar to take the air hit is the superior trade.
There is also a chance he drops the Ysaar pickup — always a bonus.
If you have not internalised the defensive response to Ysaar, just charge into it voluntarily.
For reference, Rashid's Ysaar damage by gauge spent:
- No extra gauge: 2000 damage
- 2 bars: 3000 damage
- 4 bars: 4000 damage
LPLK (Forward Throw)
In the center, back wakeup avoids all okizeme. In-place wakeup lets Drive Rush → 6HK land meaty for +1F on block.
After back wakeup, Rashid's only meaningful option is charging Whirlwind Shot — but the distance is too great, so retreating further makes it whiff.
- Back wakeup: no okizeme at all — choose this to completely deny pressure
- In-place wakeup: play the Drive Rush 6HK vs. throw mix-up while maintaining screen position
If you block 6HK at +1F: fastest 4F mash or delayed tech are the best risk-return options. Reversal options like 2MK lose to 6HK's low-evade property — avoid them.
Recommended Counter
- Back wakeup
- Nothing lands at all
- Surprisingly, some Rashid players throw 6HK without confirming the wakeup — punish the whiff with a poke
- In-place wakeup
- Even with Drive Rush, his throw is not meaty
- Even with Drive Rush, only 6HK lands as a strike — aim for Just Parry on 6HK for highest expected value
4LPLK (Back Throw)
Back throw leaves Rashid better than forward throw. Regardless of wakeup choice, Drive Rush → 6HK lands meaty for +1F on block.
Recommended Counter
- In-place wakeup: not recommended — both throw and strike are meaty
- Back wakeup:
- His throw is not meaty
- Only 6HK lands as a strike — aim for Just Parry on 6HK